
How-to · eight steps · any editor
How to make photos look like film
How to make photos look like film comes down to eight small changes, made in this order: the right photo, a split color cast, lifted blacks, rolled-off highlights, grain, halation, a little wear, then a frame and a date. Values are for any editor. The last section shows the fast route in CAM135. It looks like film. It is not film.
01Step 1 · the photo
Start with the right photo.
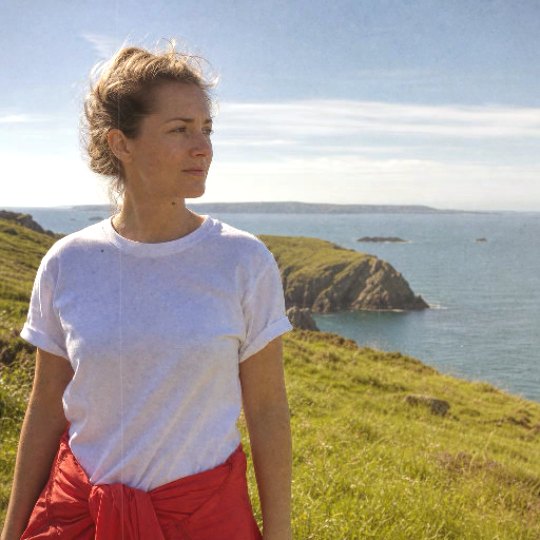
The look sits on top of the picture, so a good picture needs less. Soft light does half the work before you touch a slider.
- Light
- Overcast sky, open shade, the hour after sunrise. Hard noon sun crushes shadows for good.
- Exposure
- Expose for the face, then go about a third of a stop brighter. Dark digital shadows turn to mud when you lift them later.
- Sharpening
- Turn sharpening and noise reduction down. Heavy sharpening makes grain look like noise, and heavy noise reduction wipes out the texture you are about to add.
- Phone processing
- Phones merge several frames and sharpen by default, which is why the picture looks flat and clean. Some of that you can change in settings. For iPhones, see how to make iPhone photos look like film.
02Step 2 · the color cast
Give it a color cast, then split it.
Film does not tint a picture one way. Its shadows lean one color and its highlights another. A single warm filter slides the whole picture together and reads as a filter.
- Shadows
- Toward teal or green. In a color-grading panel, hue about 170 to 200, saturation 8 to 15.
- Highlights
- Toward amber or orange. Hue about 30 to 45, saturation 10 to 20.
- Saturation
- Take it down 5 to 10 overall, a little more on reds and oranges. Keep midtones near neutral so skin stays warm, not orange.
- The check
- Find something gray in the picture. Its dark part should lean one color and its bright part another. If both lean the same way, you used a tint.
03Step 3 · the blacks
Lift the blacks.
A film black is never a screen black. Fog in the film base and stray light inside the camera lift the darkest tones to a warm dark gray. That matte floor is the biggest single difference from a phone photo.
- Tone curve
- Drag the bottom-left point straight up, from 0 to about 10 to 14 on a 0 to 255 scale. That is 4 to 6 percent.
- Sliders only
- Raise Blacks, or the black point, until the darkest pixels are no longer pure black. The histogram should stop short of the left edge.
- Where to stop
- Around 20 of 255, which is 8 percent. Past that the picture goes hazy. Tint the lift toward the shadow color from step 2, not neutral gray.
04Step 4 · the highlights
Let the highlights roll off.
Digital highlights run up a straight line and hit white all at once. Film's bend. The curve flattens near the top, so skies and skin slide into white instead of snapping to it.
- Top end
- Lower the top-right point of the tone curve from 255 to about 240 to 246, so pure white is never quite reached.
- Shoulder
- Add a point near the three-quarter mark, about 190, and nudge it up a few points. Let the curve flatten toward the top. You want a gentle shoulder, not a ramp.
- Sliders only
- Highlights minus 20 to minus 40 and Whites minus 10 to minus 25 get you most of the way.
- Contrast
- Add a soft S through the midtones. A lifted floor under a lowered ceiling looks flat until the middle gets some punch back.
05Step 5 · the grain
Add grain: size first, then amount.
Grain is clumps, not noise. It has a size, and faster film has bigger clumps. Pick the size before you pick how much.
- Size
- On a 12-megapixel photo, aim for clumps about 2 to 4 pixels across at 100 percent. Grain that vanishes when you zoom in reads as digital noise.
- Roughness
- Set roughness, or irregularity, at 50 to 65. Even, round specks look like a pattern laid on top.
- Amount
- Then raise it slowly: 15 to 25 on a 0 to 100 scale for color, 30 to 40 for black and white. If you can see it at thumbnail size, back off.
- Where it sits
- Film grain is heavier in the shadows and midtones and thin in the highlights. Blend it in Overlay or Soft Light, or hold it back in the whites with a luminosity mask.
- Order
- Add it after sharpening and after resizing. Grain scaled down turns to mush, and grain added before sharpening gets sharpened into noise.
06Step 6 · the glow
Add halation, but only to bright lights at night.
Halation is the soft red-orange glow around a bright light on color film. Light passes through the emulsion, bounces off the backing and exposes the film a second time around the edge of the bright spot. It needs a bright light in a dark scene.
- Select
- Duplicate the photo. On the copy, keep only the brightest areas. A curve that crushes everything below about 85 percent to black works, and so does a luminosity mask.
- Blur
- About 1 percent of the long edge, which is roughly 40 pixels on a 12-megapixel photo.
- Tint
- Red-orange, hue about 5 to 15.
- Blend
- Screen mode at 20 to 40 percent opacity. A glow or bloom slider does the same job, kept very low. Skip it on daylight pictures.
07Step 7 · the damage
Darken the corners, then add dust and one leak.
These three are wear. Each is easy to overdo, and the overdone version reads as a filter. If you notice it before the picture, it is too much.
- Vignette
- Amount minus 10 to minus 20, midpoint wide, feather high. Feel the corners, do not see a ring.
- Dust
- A dust texture in Screen mode at 10 to 30 percent opacity, or a handful of specks and one hair painted by hand. Dust sits on the outside of the negative, so it goes over the grain.
- Light leak
- A warm orange or red wedge from one edge, in Screen mode at 15 to 30 percent opacity. Use it on one photo in five.
08Step 8 · the frame and the date
Frame it and date it last.
A border and a date belong to the print, not the picture. Add them after everything else, so the grain, the fog and the vignette do not run through them.
- Frame
- A thin, even border, or an instant-print frame with a deeper bottom. White suits a print. Black suits a scanned negative.
- Date
- Small, orange-red, in the bottom right corner, about 2 to 3 percent of the picture's height. Write it like 26 08 22. A stamp the size of a headline looks like a watermark.
- Export
- Save once, at full size, at JPEG quality 90 or above.
09The easy route
Or make photos look like film in one pass.
CAM135 does part of the list for you, on the phone. It does not do all of it, and here is which part.
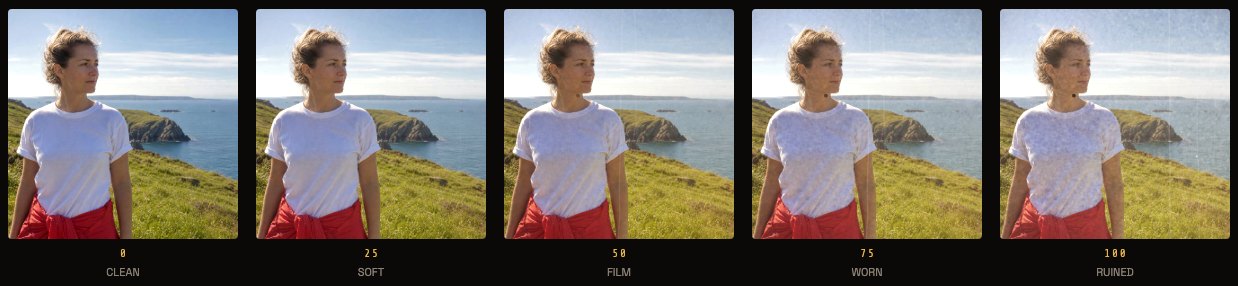
Against the steps: the film's color look and cast cover part of step 2. Fog covers step 3. Grain is step 5, at a size the film chooses. Dust and the vignette are step 7. Rolloff, halation, leaks on photos you already have, and the frame and date are yours to do, by hand, in any editor. For the film names, see film filters, and for the argument behind all of this, film vs digital.
In short: CAM135 puts one of 11 film filters on up to 20 photos at a time, adding the color cast, grain, fog, dust and a vignette, on your phone with no upload. The full list of what it does and does not do is on app to make photos look like film.
It adds no halation, no highlight rolloff and no color crossover, and light leaks come only live, from five of the cameras or from a look you saved yourself, never from the batch. The separate AI photo editor has an Add halation job; it runs in the cloud and uses credits.
10Pricing
First 30 free. Then $19.99 once.
First 30 photos and videos with everything unlocked, then 3 films and 3 cameras stay free. No watermark, no ads.
$19.99 ONCE UNLOCKS EVERYTHING · $7.99 / MONTH ADDS CLOUD BACKUP · BATCH FILTER NEEDS PRO AFTER YOUR FIRST 30
Questions
The short answers.
- How do you make digital photos look like film?
- Warm the color and split it between shadows and highlights, lift the blacks, let the highlights roll off, add grain, add halation to night lights, then small imperfections and a frame. CAM135 does the color, grain, fog, dust and corners in one pass. It does not add halation or light leaks to photos you import.
- Can I make photos look like film for free?
- A free editor can do all eight steps by hand. In CAM135, your first 30 photos and videos have everything unlocked, with no card. After that, 3 films and 3 cameras stay free, and running the batch filter on photos from your library needs PRO, $19.99 once.
- What is halation?
- A soft red-orange glow around bright lights on color film, caused by light bouncing off the film's backing. You see it at night, around signs and streetlamps.
- How much grain is too much?
- If you can see it at thumbnail size, back it off. Set the size first, then raise the amount slowly. In CAM135 the dial reads SOFT at 25, where a fresh install starts. WORN and RUINED are for effect.
- Does making a photo look like film lower its quality?
- Edit once and export once, at full size and JPEG quality 90 or above. In CAM135, photos you import are scaled to at most 2048 pixels on the long edge and saved as JPEG, and your originals stay untouched in your library. Photos shot in the app are written at up to 24 megapixels on newer iPhones and about 12 on Android.
- Does it look like film, or is it film?
- It looks like film. It is not film. Everything here, by hand or in an app, is emulation.